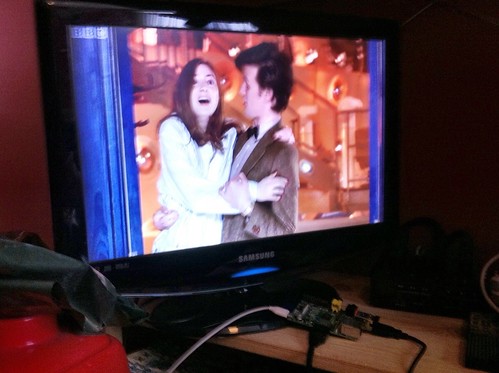
Our kids have a multitude of gizmos, but still they fight over the TV; Kid A wants to watch something back off the PVR, while Kid B is playing on the Wii and Kid C wants to watch Strictly back on the iPlayer as we won’t have it on in the house and I can’t be wasting hard disk space on such flim-flammery.
We have a small Samsung TV in the small back room that just has Freeview – which apparently is not enough for today’s non-linear kids. So I decided to make use of our spare Raspberry Pi by sticking it in the unloved TV to make a media centre. This is very much a work in progress, just notes to myself to remind me what I did when I need to do it again. And if anyone else finds it useful, so much the better.
1) Our main computer is an iMac, and I followed these instructions to make an SD card with RaspBMC on it. RaspBMC is a version of the open source XBMC media centre optimised for the Raspberry Pi. I used a 4GB SanDisk card. http://www.raspbmc.com/wiki/user/os-x-linux-installation/. (I had to reformat the card in OS X disk utility as one 4GB DOS partition first as it had already been partitioned in three parts for a previous Raspberry Pi install, and it was impossible to pick the correct disk to over-write.)
2) I put the SD card in the Pi, plugged the Pi into internet by ethernet, connected to the TV by HDMI and powered it up. It updated, repartitioned, did all that groovy stuff – but when it was finally ready to rumble, the TV screen went black and the TV complained ‘mode not supported’. I half-expected this – this old Samsung LE19R86BD TV has caused problems before with its somewhat flaky HDMI support. I had to log into the Pi by SSH from the iMac to edit a config file. First, I found the IP address of the Pi by looking at the admin web page for my broadband router. Then in the OS X terminal I typed
ssh pi@192.168.1.72
(your IP address will be different). The default password is ‘raspberry’. This gives you command line access to the Pi.
I then navigated to /boot/ and typed
sudo nano config.txt
to edit the config file and added a line
hdmi_mode=20
and chose the ‘Just Scan’ picture size mode on the Samsung remote. Then I had a picture!
2017 UPDATE ON THE SAMSUNG TV SETTINGS
If you’ve found this page by googling ‘Samsung LE19R86BD TV Raspberry Pi HDMI’ then I should note that recently (summer 2017) I found I had to use slightly different settings in the /boot/config.txt file to get a picture.
I found I got a reasonable picture (letterbox but I think aspect ratio is ok) by using
hdmi_group=1

hdmi_mode=4
and I adjusted the left and right overscan by 16. You could probably adjust the top and bottom by -16 but you may get aspect ratio problems.
3) Next I got wifi working. I have an Edimax EW-7811UN Wireless 802.11b/g/n 150Mbps Nano USB Adaptor. Setting it up is easy in RaspBMC – with it still connected by ethernet, go to the Programs tab and add a new one called ‘Network Manager’. This allows you to configure the Edimax wifi dongle easily from a keyboard.
4) Couldn’t find any video to play off my Humax box – I think I need to buy an MPEG2 codec licence key from the good people at Raspberry Pi HQ. Airplay works though – I can play video off my iPhone onto the TV. I also got the BBC iPlayer working – and the ITV Player. There’s not much on ITV I want to watch, mind – apart from 31 episodes of The Professionals.
I followed these slightly confusing instructions: http://djb31st.co.uk/blog/catch-up-tv-on-raspberry-pi-raspbmc-bbc-iplayer/ – can’t get 4OD to work yet, but iPlayer does :)
I’ve not investigated pointing devices or remote controls yet – for now it’s working well with just an old USB keyboard.
So I got the iPlayer working on an old TV using: a Raspberry Pi, a £10 USB wifi adaptor, a Kindle power adaptor, a cheap 4GB SD card and a cheap HDMI lead.
…well, what else was I going to watch after all that? Hello, Pond.


Thanks for the post really useful. I too was having the Samsung TV problem with no picture. I’m afraid I choose the cheap option to edit the config file and plugged the sd card into my Mac and edited the config file that way. Cheers and happy christmas
Thanks for this! I have the same TV and having gone through the process of setting up, was hit with the same error. Very glad to find out there was a workaround rather than having to wait until I got my new TV.
Glad it was useful – this is exactly why I post this stuff!
Was having the exact same display problems with the same model of TV – 2 minutes reading this and I was up and running.
Many thanks and a happy new year to you!
Just tried a new Raspberry Pi 3 with the same old Samsung TV and I found I had to use the following settings:
hdmi_group=1
hdmi_mode=4
Not got optimised settings yet but I do have a picture.