
In the first part of this project, we made some traffic lights out of LEDs attached to a Raspberry Pi computer, and we wrote code to make them light in sequence using the Python programming language.
This was made really easy because we used a Python library called GPIO Zero. Now we’re going to add a button to simulate a pedestrian crossing, and we’ll see just how incredibly easy that is, thanks again to GPIO Zero.
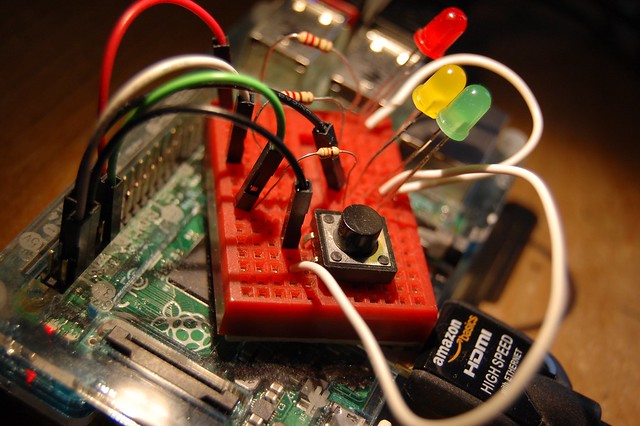
First, we need to find a switch and connect it to the Raspberry Pi. I used a tiny button that fits on my breadboard, but you can use any button as long as it’s ‘fleeting’ – that means it should pop back out when you let your finger off it.
I wired up one side of my button to GPIO 3 (that’s the blue wire in the diagram below), and the other side back to our common earth / GND (that’s column 7 A-E on my little breadboard). The wiring diagram now looks something like this:

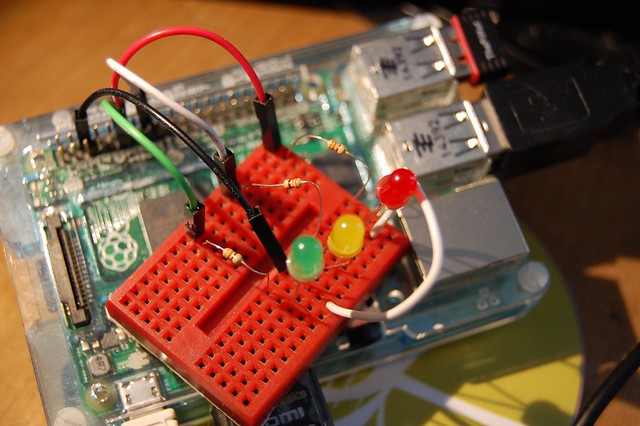
In real life, it looks something like this:
Open Python 3 / IDLE, and edit the traffic-lights.py code from last time, to look like this:

You can copy and paste the code from here:
from gpiozero import LED, Button
from time import sleep

red = LED(18)
amber = LED(2)
green = LED(17)
button = Button(3)

print("Press the button when you want to cross.")

green.on()
amber.off()
red.off()

while True:
    print("Wait")
    button.wait_for_press()
    green.off()
    amber.on()
    sleep(5)
    amber.off()
    red.on()
    print("Cross now.")
    sleep(10)
    amber.on()
    sleep(5)
    green.on()
    amber.off()
    red.off()
Now when you run the code (press F5), the traffic lights should stay green, until you press the button. This is like the button on a pedestrian crossing. Then the lights should change and you get a message in the console window telling you to cross – when the traffic light is red.
Let’s look at some new instructions we’ve used here.
from gpiozero import LED, Button
Here we’ve imported the ‘Button’ function (as well as the ‘LED’ one we used before) from the GPIO Zero library.
button = Button(3)
This tells the Raspberry Pi that we’ve connected a button to GPIO pin 3.
print("Press the button when you want to cross.")
This prints a message in the console window. That’s how we know when to cross.
button.wait_for_press()
This is a really, really clever instruction. It pauses our code until you press the button – useful because we want the traffic lights to stay green, until we want to cross the road.
So that’s it – you’ve made a working pedestrian crossing – sort of!
If you want to take this project further, here are a few ideas:
- Instead of printing ‘wait’ and ‘cross now’ in the console, add red and green LEDs for a separate set of lights for the pedestrian. Build them into a box with the button, perhaps using an old soap box.
- Add a buzzer to go BEEP BEEP BEEP when you can cross.
- Add another button for the other side of the road. Can you make the WAIT lamp light on the other side when a pedestrian presses the button to cross?
- Add another set of traffic lights for cars, and build them into cardboard tubes like toilet roll holders.
I cannot find a like button or similar to follow you.
Great work
Thank you. I’m @blogmywiki on Twitter
from gpiozero import LED, Buttonfrom time import sleep
red = LED(25)
amber = LED(8)
green = LED(7)
button = Button(21)
print("Press the button when you want to cross.")
green.on()
amber.off()
red.off()
def cicle1():
while True:
green.off()
amber.on()
sleep(5)
amber.off()
red.on()
print("Cross now.")
sleep(10)
amber.on()
sleep(5)
green.on()
amber.off()
red.off()
sleep(50)
cicle1()
# if button.is_pressed:
# restart cycle1() #if a pedestrian push the button it goes yellow and red immediately
#so he can cross, if not the cicle1() continues and the green
#led continues on for 50s
This is want I’m trying to achieve, but as I don’t know how to programming I hope you can help me.
Thanks.