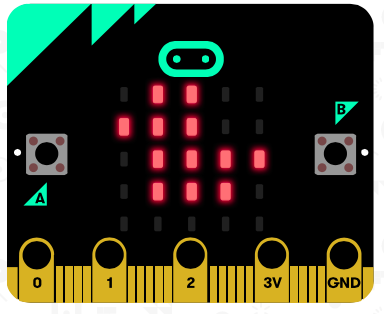
 My KS2 (upper Junior school) after-school Code Club have been split into 3 groups up until now. Some have been hacking Minecraft on one of our three Raspberry Pis, three sets of children have been exploring the Makey Makey with PlayDoh and tin foil, lately making pianos you can dance on. And the last group I have left to explore our three (yes only three!) BBC microbits. (USB mass storage devices have only just been unblocked on our school computers, I couldn’t see the point in getting any more until that was sorted).
Next week I think I will get them ALL on the microbit (I will bring in my personal hoard) and get them exploring Python and the wonderful radio features of the microbit. I’ve found before that it’s the radio that really captures children’s imaginations.
You can view my handout here or use the code below. All of this is very much based on the work of the genius Nicholas Tollervey – @ntoll on twitter.
1. Wireless microbit: the teleporting duck
You will need at least 2 microbits for this activity, an battery packs would be nice but not essential. Use the Mu editor or this web site: https://python.microbit.org/ to put these Python programs on your microbits.
Press button A to teleport a duck to another microbit:
from microbit import display, button_a, Image
import radio
radio.on()
while True:
    message = radio.receive()
    if message:
        display.show(Image.DUCK)
    if button_a.was_pressed():
        display.clear()
        radio.send("duck")
-> Can you send different pictures? Try HEART, RABBIT, COW, PACMAN
-> What happens if you have more than 2 microbits running this code?
-> Could you send a different picture by pressing button B? Hint:
from microbit import display, button_a, button_b, Image
import radio
radio.on()
while True:
    message = radio.receive()
    if message == "duck":
        display.show(Image.DUCK)
    if message == "cow":
        display.show(Image.COW)
    if button_a.was_pressed():
        display.clear()
        radio.send("duck")
    if button_b.was_pressed():
        display.clear()
        radio.send("cow")
2. Add channels
We can make sure the duck is sent to the right address using radio channel numbers. Agree on a channel number between 0 and 50 with your partner and make sure no other group has the same number.
Add this line after import radio and before radio.on():
radio.config(channel=10)
Flash the new Python program to both your microbits and see what happens.
3. Chuck a duck
This version of the program allows you to send a duck by shaking your microbit. Make sure you flash the same code on to your partner’s microbit and that you have matching channel numbers that don’t clash with another group’s.
from microbit import display, Image, accelerometer
import radio
radio.config(channel=10)  # choose channel number
radio.on()
while True:
    message = radio.receive()
    if message == "duck":
        display.show(Image.DUCK)
    if accelerometer.was_gesture("shake"):
        display.clear()
        radio.send("duck")
-> What is the range of the microbit radio transmission?
-> Can you play a ‘hot potato’ game where the person left holding the duck after 1 minute loses?
-> Could you use the radio features of the microbit to do other things?
