RaspberryPi internet radio with display

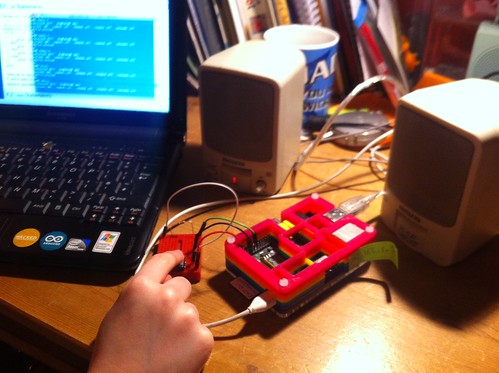
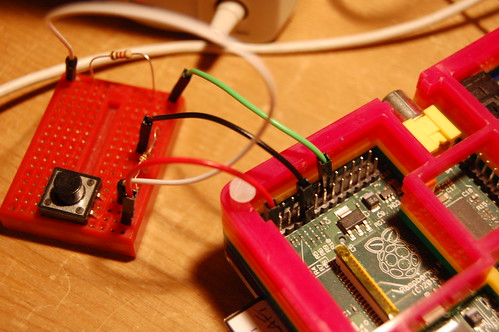
I liked the simple elegance of my Really Simple Raspberry Pi internet radio that just had a push button to change the channel… but I saw this project that connected a RaspberryPi radio to an Arduino LCD shield for displaying station names and for controlling the radio with buttons.

I happen to have an unused Arduino Uno and LCD shield lying around, so I decided to have a go at this myself. My LCD is a different kind, so I had to change the code for my shield – it’s one of these: http://www.hobbytronics.co.uk/arduino-lcd-keypad-shield

The main steps were:

1) Install mpc & mpd, add 7 internet radio stations.

2) Install nanpy.

3) Add the code below.

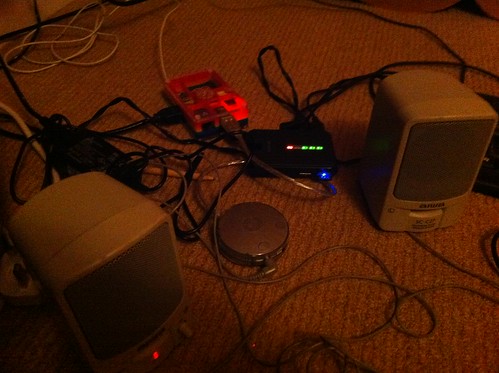
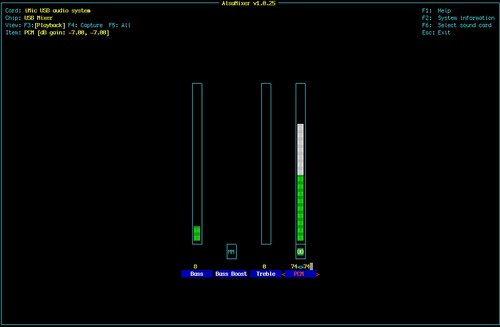
So far my code only changes the channel up and down, next step is to do volume as well. I had to use a USB port to drive the display, so I’m back to using the Pi’s internal headphone jack rather than USB. It’s also not very stable – sometimes it is better to keep things simple. It’s usually fairly obvious which station you’re listening to, so does a radio need an LCD display?

Here’s my rough Python code. I called it lcd-soundsystem.py. Ahem.

#!/usr/bin/env python
import time
import os
from nanpy import Arduino
from nanpy import (Lcd)
Arduino.pinMode(0, input)

lcd = Lcd([8, 9, 4, 5, 6, 7], [16, 2])

lcd.printString("MyLittleRadio v1", 0, 0)
lcd.printString("by @blogmywiki  ", 0, 1)
time.sleep(2)

def getKey():
   val = Arduino.analogRead(0)
   if val == 1023:
      return "NONE"
   elif val < 100:
      return "RIGHT"
   elif val < 200:
      return "UP"
   elif val < 400:
      return "DOWN"
   elif val < 600:
      return "LEFT"
   elif val < 800:
      return "SEL"
   else:
      return "KBD_FAULT"

def getTrack():
  L= [S.strip('\n') for S in os.popen('mpc').readlines()]    # Get the Track info from the stdout of the mpc command
  sttn = L[0][0:15]                                                         # Pick out the Station and Track info
  lcd.printString(16*" ", 0, 0)                                            # Send it out to the LCD Display
  lcd.printString(sttn, 0, 0)
  lcd.printString(16*" ", 0, 1)
  print L
  print sttn

station = 4
os.system("mpc play 4")
getTrack()

while True:
  #take a reading
  key=getKey()
  if key == "UP":
    station += 1
    if station > 7:
       station = 1
    print(str(station))
    os.system("mpc play " + str(station))
    getTrack()
  elif key == "DOWN":
    station -=1
    if station < 1:
       station = 7
    print(str(station))
    os.system("mpc play " + str(station))
    getTrack()
Posted in Arduino, Raspberry Pi, Raspbian | Tagged , , , | 4 Comments

Making my PiRadio run at startup

Oddly, the hardest thing so far has been making my Really Very Simple RaspberryPi radio start playing by itself when you turn it on. Which is really the sort of thing you expect a radio to do, really. Not much to ask, you’d think.

First I made an internet radio with some bits of rubbish lying round the house. Then my daughter and I added a button to change the station.

I’ve been going crazy trying to figure out ways of getting the radio to start of its own accord as the Pi boots up, trying to edit rc.local, using @reboot statements in crontab – none of it worked. I thought it might be permission problems, possibly I needed to reinstall mpd and mpc as a different user… Eventually I thought of looking at the mpd (music player daemon) logs – they live in /var/log/mpd/mpd.log

Here I found that the problem was a lack of network connectivity – there were lots of ‘Couldn’t resolve host’ and ‘Network is unreachable’ errors each time I rebooted. It seems that the problem is my Edimax wifi dongle, which is taking a LONG time to get on the network.

I found, by trial and error improvement, that if I added this line to /etc/rc.local:

(sleep 65; python /home/pi/radio.py)&

the radio starts playing – eventually – by itself when you turn the Raspberry Pi on. It takes an age to start up though, so long that by the time it starts playing a radio station you’ve almost forgotten you turned it on. So I think if we do put this in a box, we’ll need to add another button as an ‘on/off’ switch that in fact just sends an ‘mpc stop’ command and leaves the Raspberry Pi running in the background. Perhaps I can find something else of use the Pi can do in the meantime…

Also, as I already have an Arduino with an LCD shield, I quite like the look of this project using an Arduino-RaspPi combo, a bit like I did with my Fridge Gizmo.

Posted in radio, Raspberry Pi, Raspbian | Tagged , , , , | Leave a comment

PiRadio part 2 – adding a button

Tonight my daughter (8) helped me add a button to my RaspberryPi internet radio, which I made out of bits of electronic rubbish lying round the house.

Tilly testing radio button

We started by going back to basics and just getting a button working. We used this tutorial and used the pull-down resistor diagram – it’s not clear on the web site but it’s the lower of the 2 circuit diagrams. We used GPIO pin 23 instead of 17, but other than that it’s just the same. Using a little breadboard, we connected 1 side of the switch to the 3.3v pin on the RaspberryPi. The other side of the switch is connected via a 1K resistor to RaspberryPi GPIO pin 23, and via a 10K resistor to a GND pin on the Pi.

Adding a push-button to change channel on my PiRadio

We then used a simple bit of code to test the button, incrementing and printing a variable called ‘station’ by 1 when the button is pressed. As in the tutorial we found that pressing the button even briefly caused the station counter to go up to 188. As far as I know, there’s no BBC Radio 188, so we had to add the debounce code. This made all the difference – now the counter just went up by 1 each time we pressed the button, even if we held it down for a long time.

Then we wrote some code to get MPC to play the next station in its playlist every time we press a button. I’ve already added 7 stations, BBC Radio 1 – 6 and NPR. (I used to work for NPR, and have a soft spot for them). If the station number gets higher than 7 (NPR), it gets set back to 1 (BBC Radio 1).

PiRadio - adding a button

We called this code radio.py and ran it by typing sudo python radio.py at the command line.

We noticed initially that the radio didn’t come on when we ran the Python script, only when we pressed the button, and it jumped straight to Radio 2. So we added a line os.system(“mpc play 4″) near the top to start it playing from the get-go. I also set it to start playing Radio 4 by default, as that’s the station I probably listen to most of all.

We had a discussion about how real radios behave – we found that most radios remember which station you were listening to last time, and tune to that station when you turn them on. Next time we’ll see how we can make our radio do this.

Here’s our simple radio code:

#!/usr/bin/env python

import RPi.GPIO as GPIO
import time
import os

GPIO.setmode(GPIO.BCM)
GPIO.setup(23, GPIO.IN)

station = 4
os.system("mpc play 4")

#initialise previous input variable to 0
prev_input = 0
while True:
  #take a reading
  input = GPIO.input(23)
  #if the last reading was low and this one high, do stuff
  if ((not prev_input) and input):
    print("Button pressed")
    station += 1
    if station > 7:
       station = 1
    print(str(station))
    os.system("mpc play " + str(station))

  #update previous input
  prev_input = input
  #slight pause to debounce
  time.sleep(0.05)
Posted in Raspberry Pi, Raspbian, thrift | Tagged , , | 1 Comment

Making an internet radio from a Griffin iMic and RaspberryPi

IMPORTANT UPDATE – July 2015: BBC Radio addresses have changed – see here for more info. And Fip has moved to http://audio.scdn.arkena.com/11016/fip-midfi128.mp3

Continuing the theme of making something useful out of unloved gadgets lying round the house, today I started to build some sort of audio device from another unused Raspberry Pi and an ancient Griffin iMic – this was a silver hockey-puck shaped USB audio IO device that I bought donkeys years ago for my Bondi Blue iMac. I also found some old powered PC speakers that had been in the loft, and a random old power supply.

I’m not sure if I’m eventually going to make an internet radio or something to stream audio from some networked storage yet – the first step was to get some sound out.

Music player made out of rubbish

It’s a good idea to use a USB audio device for music on the Pi, as the onboard audio jack is not good quality.

I started by following the advice here: http://computers.tutsplus.com/articles/using-a-usb-audio-device-with-a-raspberry-pi–mac-55876

In short, I copied a WAV file onto my Pi’s desktop, and rebooted the Pi up with the Griffin iMic plugged into the top USB socket (I tried it in a powered USB hub and it didn’t work). I then edited an audio config file by typing

sudo nano /etc/modprobe.d/alsa-base.conf

at the command line, and commenting out the line

options snd-usb-audio index=-2

by putting a hash sign at the front:

# options snd-usb-audio index=-2

and saving it by pressing ctrl-x and y to over-write the file.

I plugged my PC speakers into the mains, plugged the jack into the iMic’s audio out socket, then rebooted the Pi, navigated to the desktop at the command line and typed

aplay TheDaysWeMade.wav

and sweet music came forth! Didn’t even need to hunt for any drivers. (I do love the Paper Aeroplanes, but I need to get some more music on here soon!)

You can even turn the volume up at the command line by typing alsamixer

AlsaMixer showing Griffin iMic

Next steps – playing MP3 files, internet radio (I’ve asked Santa for a PiFace display control gizmo – could be the start of a beautiful but of gadget making!), who knows?

I just made a quick and dirty command line internet radio that plays BBC Radio 6music and Radio 4 by installing mpd and mpc:

sudo apt-get install mpc mpd

and then adding the BBC 6music like this:

mpc add http://bbcmedia.ic.llnwd.net/stream/bbcmedia_intl_lc_6music_p?s=1365376386&e=1365390786&h=de40a9915206c4402c73e3766dc3fec0

adding BBC Radio 4 by typing

mpc add http://bbcmedia.ic.llnwd.net/stream/bbcmedia_intl_lc_radio4_p?s=1365376126&e=1365390526&h=ed9a0642b30c422b07fbcd8683c52335

and then typing

mpc play 1

for 6music (the first one I added), mpc play 2 plays Radio 4. There are more BBC radio stations listed here.

Plenty more to do – get it to run at boot, controls, displays, a pretty box – but amazing how quickly you can turn a pile of rubbish into something useful like an internet radio.

UPDATE

I’ve since written up a very simple Raspberry Pi internet radio here, and started working on a fancier one with an LCD display and buttons for volume and station changing.

Posted in music, Raspberry Pi, thrift | Tagged | 3 Comments

Making a wireless printer from a Raspberry Pi

Untitled

I had two bits of unused hardware knocking around – a Raspberry Pi that used to run my Go Free Range weather printer (the thermal printer broke – another story), and an old Samsung ML-1510 black and white laser printer that was pretty useless to me as you can’t get up-to-date Mac OS X drivers for it. The laser printer only cost me about £40 when new, but I hate seeing things go to waste.

I wondered if it was possible to glue them together – turn the Raspberry Pi into a print server that I could leave on all the time plugged into the laser printer. And, dear reader, it is possible. And incredibly easy. Using this guide: http://www.bartbania.com/index.php/cups-raspberry-printer/ I had it working in about 30 minutes.

The only thing I’d add is that you should update your Pi by typing
sudo apt-get update
at the command line before installing CUPS. But other than that, it worked like a dream. I couldn’t see a link called ‘Do Adminstration Tasks’, but when I went to the web page for managing the print server on my laptop and tried to change the settings to share my new / old laser printer to the network, I was challenged for a password, and provided the user name and password for my Raspberry Pi login. I added the printer by turning it on, and plugging its USB socket into the Pi’s remaining free socket and clicking on the ‘add printer’ button on the web page. I searched for Samsung and found the ML-1510 in the list – a relief after lots of OS X driver hell for this printer. (The Pi’s other USB socket has a wifi dongle in it. This is a ‘headless’ Pi with no screen, keyboard or mouse, and I control it at the command line by using SSH from another computer).

Screen shot 2013-12-09 at 22.51.49

So now, on an Apple Laptop, if I go to print, I see my Samsung printer listed ‘@raspberrypi’. I fired up Word and printed a ‘Hello World!’

Turning a RaspberryPi into a wireless print server

A useless laser printer and unloved Pi are now doing useful work once more, and I’m hoping we can print our essays out a bit more crisply and more cheaply than on our ink jet printer. We can print from our iMac, our iPhones, laptops and even from our old iPad (although not, at the moment, from an Android tablet). Not a bad result for half an hour’s tinkering.

Untitled

As for my thermal printer… well, that’s another story…

Perhaps I can write a script to print the BBC Weather page every morning at 6am…

Post Script

I just remembered why I bought the laser printer in the first place – I wanted to get into Print Gocco print making. And then they stopped making Print Goccos. Why? Why why why why? The Chinese can put a probe on the moon, but the Japanese can’t make Goccos any more? Oh what days we live in…

Posted in Linux, Raspberry Pi, Raspbian, thrift | 4 Comments