RaspberryPi dice project

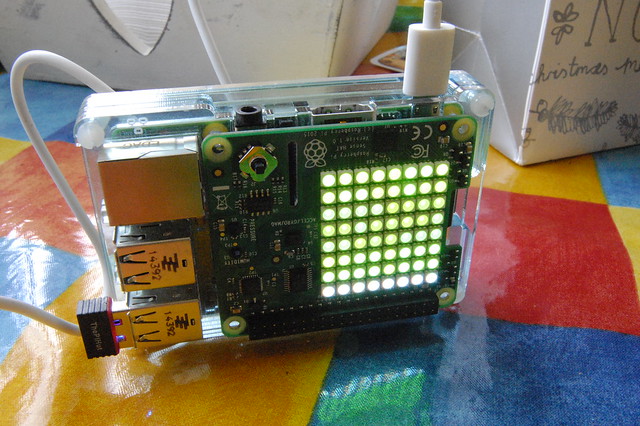
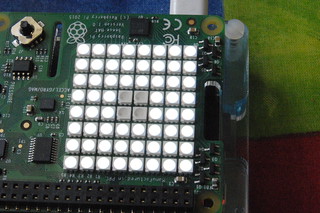
Here’s a simple dice (ok, die) project for the Raspberry Pi SenseHAT – it senses a shake by measuring the G-force on the accelerometer. If the G-force goes above 1.4, it generates a random number between 1 and 6 and displays a dice (die) pattern. I chose 1.4 so it’s not too sensitive – you have to give it a decent shake, and I put in a small sleep statement so it doesn’t do multiple rolls in one go.

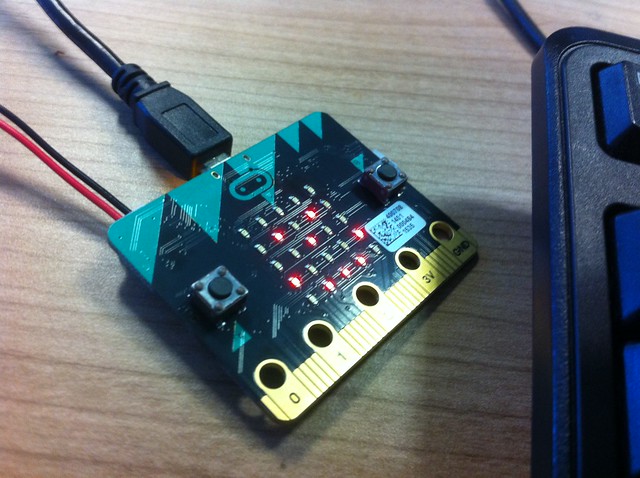
It’s inspired by this BBC Microbit project – but then I’m still waiting for my own Microbit…

Here’s the Python code:

from sense_hat import SenseHat
import time
import random

sense = SenseHat()

sense.clear()

sense.show_message("Shake to roll!")

b = [0, 0, 0]
g = [0, 255, 0]
r = [255, 0, 0]

one = [
b,b,b,b,b,b,b,b,
b,b,b,b,b,b,b,b,
b,b,b,b,b,b,b,b,
b,b,b,g,g,b,b,b,
b,b,b,g,g,b,b,b,
b,b,b,b,b,b,b,b,
b,b,b,b,b,b,b,b,
b,b,b,b,b,b,b,b,
]

two = [
b,b,b,b,b,b,b,b,
b,g,g,b,b,b,b,b,
b,g,g,b,b,b,b,b,
b,b,b,b,b,b,b,b,
b,b,b,b,b,b,b,b,
b,b,b,b,g,g,b,b,
b,b,b,b,g,g,b,b,
b,b,b,b,b,b,b,b,
]

three = [
g,g,b,b,b,b,b,b,
g,g,b,b,b,b,b,b,
b,b,b,b,b,b,b,b,
b,b,b,g,g,b,b,b,
b,b,b,g,g,b,b,b,
b,b,b,b,b,b,b,b,
b,b,b,b,b,b,g,g,
b,b,b,b,b,b,g,g,
]

four = [
b,b,b,b,b,b,b,b,
b,g,g,b,b,g,g,b,
b,g,g,b,b,g,g,b,
b,b,b,b,b,b,b,b,
b,b,b,b,b,b,b,b,
b,g,g,b,b,g,g,b,
b,g,g,b,b,g,g,b,
b,b,b,b,b,b,b,b,
]

five = [
g,g,b,b,b,b,g,g,
g,g,b,b,b,b,g,g,
b,b,b,b,b,b,b,b,
b,b,b,g,g,b,b,b,
b,b,b,g,g,b,b,b,
b,b,b,b,b,b,b,b,
g,g,b,b,b,b,g,g,
g,g,b,b,b,b,g,g,
]

six = [
r,r,b,b,b,b,r,r,
r,r,b,b,b,b,r,r,
b,b,b,b,b,b,b,b,
r,r,b,b,b,b,r,r,
r,r,b,b,b,b,r,r,
b,b,b,b,b,b,b,b,
r,r,b,b,b,b,r,r,
r,r,b,b,b,b,r,r,
]

def roll_dice():
    r = random.randint(1,6)
    if r == 1:
        sense.set_pixels(one)
    elif r == 2:
        sense.set_pixels(two)
    elif r == 3:
        sense.set_pixels(three)
    elif r == 4:
        sense.set_pixels(four)
    elif r == 5:
        sense.set_pixels(five)
    elif r == 6:
        sense.set_pixels(six)

while True:
    x, y, z = sense.get_accelerometer_raw().values()

    x = abs(x)
    y = abs(y)
    z = abs(z)

    if x > 1.4 or y > 1.4 or z > 1.4:
        roll_dice()
        time.sleep(1)
Posted in Raspberry Pi | Tagged , , | 6 Comments

Spirit level for SenseHAT

Spirit level project

I just got myself an early Christmas present – a SenseHAT for the RaspberryPi. This is the same gizmo Tim Peake will be using on the ISS to run AstroPi experiments designed by school children, so I have the added excitement of having some SPACE HARDWARE on my Pi.

It has a super-bright 8×8 RGB LED matrix, a joystick and various sensors: temperature (limited use as it’s on the board), plus more usefully, sensors for air pressure, humidity, a compass and a gyroscope. It’s really easy to program in Python with the libraries provided by the Raspberry Pi Foundation, and I had text scrolling across the screen within a couple of minutes of plugging it in for the first time.

The gyroscope caught my imagination when I set it up, and my first real project was a simple spirit level. It lights up red when it’s not level, green when horizontal, blue when vertical – and when you put it flat you get a white display with a ‘bubble’ in the middle. It would a great extension to code a ‘bubble’ that moves round the screen as you tilt it.

It’s also powered off a USB battery stick so you can use it in places where the mains don’t reach.

Spirit level project
Not level – red display

Spirit level project
Horizontally level

Spirit level project
Vertically level

Spirit level project
Flat on a level surface

Here’s how it works (though the video doesn’t do justice to the lovely display due to its brightness and strobing:

And here’s the Python code, most of which is taken up with the simple images. Tweaked thanks to David Honess, who pointed out problems with .value() returning things in unexpected orders!

from sense_hat import SenseHat

sense = SenseHat()

r = [255, 0, 0]
g = [0, 255, 0]
b = [0, 0, 255]
w = [255,255,255]
z = [0, 0, 0]

redimage = [
r,r,r,r,r,r,r,r,
r,r,r,r,r,r,r,r,
r,r,r,r,r,r,r,r,
r,r,r,r,r,r,r,r,
r,r,r,r,r,r,r,r,
r,r,r,r,r,r,r,r,
r,r,r,r,r,r,r,r,
r,r,r,r,r,r,r,r,
]

greenimage = [
w,w,w,w,w,w,w,w,
g,g,g,g,g,g,g,g,
g,g,g,g,g,g,g,g,
g,g,g,g,g,g,g,g,
g,g,g,g,g,g,g,g,
g,g,g,g,g,g,g,g,
g,g,g,g,g,g,g,g,
g,g,g,g,g,g,g,g,
]

blueimage = [
w,w,w,w,w,w,w,w,
b,b,b,b,b,b,b,b,
b,b,b,b,b,b,b,b,
b,b,b,b,b,b,b,b,
b,b,b,b,b,b,b,b,
b,b,b,b,b,b,b,b,
b,b,b,b,b,b,b,b,
b,b,b,b,b,b,b,b,
]

whiteimage = [
w,w,w,w,w,w,w,w,
w,w,w,w,w,w,w,w,
w,w,w,w,w,w,w,w,
w,w,w,z,z,w,w,w,
w,w,w,z,z,w,w,w,
w,w,w,w,w,w,w,w,
w,w,w,w,w,w,w,w,
w,w,w,w,w,w,w,w,
]

sense.set_pixels(redimage)

while True:
    raw = sense.accel_raw
    x = raw["x"]
    y = raw["y"]
    z = raw["z"]
    print (x,y,z)

    if (-0.02 < x < 0.02) and (-0.02 < y < 0.02) and (0.98 < z < 1.02):
        sense.set_pixels(whiteimage)
    elif (-0.02 < x < 0.02) and (-0.90 > y > -1.1):
        sense.set_pixels(greenimage)
    elif (-0.02 < y < 0.02) and (-0.90 > x > -1.1):
        sense.set_pixels(blueimage)
    else:
        sense.set_pixels(redimage)

This is the original version of the code, which is unreliable as it reads the variables in a random order:

from sense_hat import SenseHat

sense = SenseHat()

r = [255, 0, 0]
g = [0, 255, 0]
b = [0, 0, 255]
w = [255,255,255]
z = [0, 0, 0]

redimage = [
r,r,r,r,r,r,r,r,
r,r,r,r,r,r,r,r,
r,r,r,r,r,r,r,r,
r,r,r,r,r,r,r,r,
r,r,r,r,r,r,r,r,
r,r,r,r,r,r,r,r,
r,r,r,r,r,r,r,r,
r,r,r,r,r,r,r,r,
]

greenimage = [
w,w,w,w,w,w,w,w,
g,g,g,g,g,g,g,g,
g,g,g,g,g,g,g,g,
g,g,g,g,g,g,g,g,
g,g,g,g,g,g,g,g,
g,g,g,g,g,g,g,g,
g,g,g,g,g,g,g,g,
g,g,g,g,g,g,g,g,
]

blueimage = [
w,w,w,w,w,w,w,w,
b,b,b,b,b,b,b,b,
b,b,b,b,b,b,b,b,
b,b,b,b,b,b,b,b,
b,b,b,b,b,b,b,b,
b,b,b,b,b,b,b,b,
b,b,b,b,b,b,b,b,
b,b,b,b,b,b,b,b,
]

whiteimage = [
w,w,w,w,w,w,w,w,
w,w,w,w,w,w,w,w,
w,w,w,w,w,w,w,w,
w,w,w,z,z,w,w,w,
w,w,w,z,z,w,w,w,
w,w,w,w,w,w,w,w,
w,w,w,w,w,w,w,w,
w,w,w,w,w,w,w,w,
]

sense.set_pixels(redimage)

while True:
    pitch, roll, yaw = sense.get_orientation().values()
#   print (pitch, roll, yaw)
    if (pitch < 3 or pitch > 355) and (yaw < 3 or yaw > 355):
        sense.set_pixels(whiteimage)
    elif pitch < 0.5 or pitch > 359.5:
        sense.set_pixels(greenimage)
    elif yaw < 5 or yaw > 355:
        sense.set_pixels(blueimage)
    else:
        sense.set_pixels(redimage)
Posted in operating systems, Raspberry Pi | Tagged , , | Leave a comment

Is the BBC Microbit project fatally damaged?

BBC Microbit training

In September 2015 I was very excited to be starting a job teaching KS3 Computing and ICT at the time when the BBC Microbit was being given, free of charge, to every Year 7 child in the country – or every Year 7 child whose teachers were aware of the scheme and registered for it which, I suspect, is not precisely the same thing.

But we are still waiting. This week I am planning my scheme of work for the Spring Term – and the BBC Microbit will not feature in my Year 7 plans. They were supposed to be with us in the Autumn term, and we are still waiting. At the moment, I can’t see them being used in school until the Summer term, even if I get them in the Spring term. The current Year 7s will be lucky if they get one term’s use out of them in school.

My confidence in the project is severely damaged. With such a huge delay, I am not prepared to spend any time planning lessons, or even block off weeks in the calendar for them, until we have a complete set in school. I know there are resources online, and I can play with the online code editor – but it’s not the same as having the devices. The selling point, surely, of the Microbit is its physicality – and until we teachers have them physically in our sweaty paws, I’m afraid it’s horribly like vapourware.

If schools had just been given 1 sample device each, that would have helped. I was lucky to get to play with one in a training session, but I had to hand it back at the end of the morning. If every teacher there had been given one, we would have gone off and evangelised about it, we would have played with it, made projects, we would even have planned lessons. We wouldn’t have been able to help ourselves.

Whilst we wait, the Raspberry Pi foundation has done something even more extraordinary, I think, than the Microbit: they have given away a computer on the cover of a magazine. I know the devices cannot be compared (apples and, er, raspberries), but it’s an extraordinary achievement that, I’m afraid, makes the BBC project look shambolic. I have no idea whose fault it is, I’m not pointing the finger. I want my Year 7s to get their Microbits, I want to use them, teach with them. But if people like me, sympathetic, broadly on-side, are frustrated, I fear the Microbit project may now be fatally damaged.

Posted in computers, education, hardware, ICT | Tagged , , , | 6 Comments

Python & Scratch Bubble sorts for KS3

Here’s a bubble sort I knocked up to help teach bubble sorts in Year 9. Before we get to this point we will have looked at Hungarian folk-dancing bubble sorts, done a bubble sort ourselves in class with human numbers and planned one out in a flow chart.

There are loads of Python bubble sort code examples online, but to be honest, none of them made much sense to me. The one thing I discovered doing this was that the best way to learn how to code a bubble sort, is to code your own. And the same must surely apply to my students…

Note this code is Python 2 (or Python 2 and a half) – I had to take the brackets out of the print statement on line 16 to get it to work in Trinket. The code below works in Python 3.

Click on the ‘play’ button to see it run, change the numbers, have a play…

This is probably not a ‘pure’ bubble sort – it stops as soon as it runs through the line of numbers without making any swaps. I think a pure bubble sort just keeps chugging though every line until every possible pair has been swapped, like the first example here. But I like teaching the point of the computer knowing when to stop.

You could also use this for teaching Boolean variables as it uses
sorted = False
while not sorted:

It will keep looping until sorted = True. I think this is nice, readable English-like example of this kind of iteration and control.

It works like this: as long as the list of numbers is ‘not sorted’, it keeps scanning through the list comparing every pair of numbers. If it finds that the first number in the pair, numberList[i], is bigger than the next, numberList[i+1], it swaps them over. When it finds it can run through the list without making a single swap, the list becomes sorted and the program stops.

This is how it works in more detail:

numberList = [89, 23, 56, 45, 17, 42, 100, 76, 1, 34]
sorted = False
while not sorted:

These lines set up the list of numbers – you can use any list of any length and it should still work. Try it! It sets a Boolean variable called sorted to have the value False (as the list is not sorted, or we don’t know it’s sorted). Then it starts a loop running which keeps going until the sorted variable is True.

    swaps = 0
    for i in range(len(numberList)-1):

This sets a variable called swaps to 0 at the start of each scan of the list. We use it to count how many swaps have been made on each run through the numbers. Line 14 starts a ‘for loop’ running that will have the variable i acting as an index for the numbers of the list we’re going to compare. We could go through it 9 times, but we want this code to work for a list of any length, so the number of comparisons to make is set by using len(numberList) – the length of the list, minus 1 because we don’t want to compare the 10th and 11th numbers when there’s no 11th number.

        if numberList[i] > numberList[i+1]:
            temp = numberList[i]
            numberList[i] = numberList[i+1]
            numberList[i+1] = temp
            swaps = swaps + 1

Lines 17 to 22 are where the comparison happens. If a number is bigger than the following number, they are swapped. I think in Python you can directly swap variables or items in a list, but for readability and my sanity, I’ve stored the 1st number in a temporary variable called temp. Then the second number gets written into the first number’s place in the list, and the temp variable (holding the first number) gets written into the second number’s place. As we’ve made a swap, the swaps counter gets increased by 1. That line could also read swaps += 1.

    if swaps == 0:
        sorted = True

Line 26 tests, at the end of a run through the list, if no swaps were made. If so, the list must be sorted, so we set sorted to be True and the while not sorted: loop magically vanishes in a puff of logic. The program then says the list is sorted, prints the shiny new list and stops running. Phew!

It’s got loads of extra lines to show the sort in progress, and it’s slowed down by pausing half a second per comparison. You can strip those lines out for students to type their own shorter version like this:

Compare the two to see just how fast the sort really is.

You could also get students to add code to count how many passes, swaps or comparisons are made, then see how bubble sorts behave with different types of lists: a reversed list, a random list, a nearly-sorted list. Then they could move on to comparing bubble sort with other sort algorithms.

And if you want to show a bubble sort in Scratch, try this one I made. It makes a very satisfying ‘pop’ sound when it makes a swap, so you can hear the smaller numbers bubbling to the top of the list:

The Scratch web site also has some other types of sort here.

Posted in computers, education, ICT | Tagged , , , | 3 Comments

Python CoolPlay for OS X

Update – a new version of PyPlay is now on GitHub. It has pretty colours and gives you the out time and everything.

PyPlayCoolPlay is a very useful Windows program that plays audio files. So what? Lots of programs do that. CoolPlay is useful in radio (and theatre too I’d imagine) because it plays a file in a playlist – and then stops. It waits until you press play again before going on to the next track – important if you need to talk between items and play them in on cue.

I did some work to get CoolPlay running in OS X using WineBottler, but the resulting file is huge and it’s far from flawless – it does work, though.

I’d really like to write a native OS X or Linux version of CoolPlay, but that’s beyond my coding skills at the moment. I have been learning a fair bit of Python lately, however, and I’ve been mucking about with a Python script that will do something similar on a Mac.

It’s VERY early days, but I present a prototype PyPlay! It needs to be in the same directory as your audio files and needs a pre-existing M3U playlist file (as used by CoolPlay, VLC, iTunes and other audio players). It should play any audio file format that OS X can natively play, including M4A, MP3 and WAV.

It reads the M3U playlist into an array (list) and strips out metadata and leaves it with a list of audio files. You can then pick a file to play by number, press ctrl-c to stop it and type ‘q’ to quit the program. It doesn’t do ANY of the useful things CoolPlay does, like show you elapsed and remaining play time, durations, allow you to manipulate the playlist etc. But it does play any audio files, one at a time.

It only works on Macs because it uses afplay to play the audio – a Linux version would be possible using VLC or similar… I’ll work on that. And track duration info should be easy to display using afinfo – indeed, if you uncomment a couple of lines in the code you can get a heap of info displayed as you play…

verbose PyPlay

It’s also written in Python2 not Python3 as that’s what comes bundled with OS X and I want it to run without installing any extra software. And you’ll need to run it from the Terminal by saving it as a file called PyPlay.py and typing python PyPlay.py

Next thing I’d like to do is have an option to build and change playlists (perhaps make one automatically from any audio files found in the directory), or move up and down an existing playlist, and show file durations. I think displaying elapsed and remaining time may be too much of a challenge, but displaying an ‘out time’ (the clock time when the file will finish playing) shouldn’t be too hard.

# PyPlay radio playout script by Giles Booth @blogmywiki
# written in Python2 to run on MacOS X without installing Python3
# only works in OS X as uses afplay to play audio files
# requires an M3U playlist file called playlist.m3u
# and audio files in same directory

import os
playlist = ""

def showTracks():
    os.system('clear')
    print 'Welcome to PyPlay!'
    print 'Here are your tracks:'
    print '---------------------'
    for x in range(len(trackArray)):
        print x+1, trackArray[x]
    print 'Press ctrl+c to stop playing, q to quit'

def playTrack(track):
    song = trackArray[track-1]
    # uncomment next 2 lines if you want track info shown
    # infoString = "afinfo " + song
    # os.system(infoString)
    trackString = "afplay " + song
    os.system(trackString)

playlist = open('playlist.m3u')

trackArray = playlist.readlines()

# iterate over list in reverse order deleting unwanted items
for i in range(len(trackArray)-1,-1,-1):
    # strip out \n characters at end of line
    # and strip out empty lines or metadata
    if trackArray[i].startswith('\n') or trackArray[i].startswith('#'):
        trackArray.pop(i)
    temp = trackArray[i].strip()
    trackArray[i] = temp

while True:
    showTracks()
    trackNo = raw_input('\nWhich track would you like to play? ')
    if trackNo == 'q':
        break
    elif int(trackNo) <1 or int(trackNo) > len(trackArray):
        print 'Not a valid track number'
    else:
        playTrack(int(trackNo))
Posted in MacOS X, radio | Tagged , , , | 3 Comments